Author Topic: No__87___Regular Warm Up  (Read 5859 times)

Peter Anderson

  • Administrator
  • Sr. Member
  • *****
  • Posts: 4344
  • Plays AR 80
Re: No__87____Regular Warm Up
« Reply #15 on: July 02, 2018, 10:35:42 AM »
So here is the more energetic one:


In the following Replies you'll find a series of specific helpful suggestions in this regard.

Peter
In the interest of our members
AR-Group ADMIN

Peter Anderson

  • Administrator
  • Sr. Member
  • *****
  • Posts: 4344
  • Plays AR 80
Re: No__87____Regular Warm Up
« Reply #16 on: July 15, 2018, 09:02:58 PM »
Having the proper finger positioning is essential for all organists, as it helps prevent injury and improve technique.     Here are some extra keyboard finger exercises that you can do to help improve your skills.

Sitting down at your AR and playing a few notes is a pretty easy task, isn’t it?     Well anyone can sit on the bench, place their fingers on the keys, and make some sort of sound come out.

However, the technique we use to control the muscles in our hands, arms, and shoulders plays a very important role in our ability to play the organ well.      The muscles in our hands especially, play a vital role in our ability to make, as well as control, our desired sounds.

Great keyboard  finger technique is based on the idea of playing “from the finger” – or using the fingers as our main driving source of power.

If you’re self-taught, most of these ideas will be unfamiliar to you.    If you’ve been playing for a long time and using different techniques, breaking bad habits may take a little time.

You don’t have to get stressed, because simple adjustment can improve your technique substantially.

In essence, good finger technique utilizes the following four elements:

1   Fingers should not be flat or floppy–knuckles should generally not be straightened.

2   Typically, most fingers will be slightly bent at the knuckle closest to the fingertip. The exception is the pinky finger, which can be straightened at times.

3   The primary power source of most playing will actually come from the finger–specifically the knuckle at the top of the hand–rather than the wrist or arm.

4   Relaxation of the arm, elbow, and shoulder, and a very early preparation of the thumb and other fingers while playing.

Playing “from the finger” is incredibly important. Just think of how objects move.     If you’re holding a pencil in your hand and want to move it extremely quickly, is the motion large or small?

Likewise, in organ playing, if you wanted to play an extremely fast succession of notes, would you opt for large-scale muscles or small-scale ones?

In addition, you wouldn’t use your whole arm and upper-body to rapidly move the pencil back and forth, so why would we do that when playing the organ?

With this notion in mind, it’s easy to understand why using good organ finger technique is incredibly important.

So adjust your hand position rather than your wrist position.     Keep your wrists at an even height.
Play from your fingers rather than your arms.    If you don’t you will tend to produce accents on beats that are not in the music.

Peter
In the interest of our members
AR-Group ADMIN

Peter Anderson

  • Administrator
  • Sr. Member
  • *****
  • Posts: 4344
  • Plays AR 80
Re: No__87____Regular Warm Up
« Reply #17 on: July 17, 2018, 03:00:35 PM »
Proper organ finger positions allows an organist to play quicker, with more agility, and with greater accuracy.

So what is the Proper Organ Hand Position?

So how do I actually do it!

Thankfully, a good organ hand position is actually much easier to learn than many people think!

Like any new skill, however, maintaining good organ hand placement requires consistent practice.


Step One: To get a natural piano finger position, try standing up beside your Yamaha AR organ and relaxing your hands at your sides. If you feel tense, shake out any stress that you may have in your arms, hands, and fingers.

Step Two: One should sit far enough from the keyboard to let the fingertips rest on the keys without effort when the arms are normally bent, and your feet should reach the pedals without stretching.  This will result in a compromise situation, depending on the individual proportions of your own body.  i.e. Long legs, short arms or vice versa.   The final position must be comfortable and the best for you.

Step Three: Notice how your fingers naturally curve in toward your body and how your knuckles curve out slightly away from your body.    Also, notice how the thumb and index finger make a slight “C” shape. Keep your hands and fingers in the same position as this, but bend your arm at your elbow so your hands are in front of you with your palms down.

Step Four: The result should be that the fingertips are in contact with the keys, the knuckles of the hand should be fairly even with one another, and they should be slightly higher than the wrist. The first knuckle closest to the fingertips should be flexed during most playing styles.   It should not collapse or cause the fingers to become perfectly straight.

Step Five: The wrist should be relaxed and level with the hand. To find the ideal position, hold your fingertips on the surface of the keys while maintaining the firmness of the knuckles of the hand.    Move your wrist upwards and downwards and notice the tension created by having the wrist either too high or too low.   Now find the place in your wrist that feels most natural; often it will be where the wrist is even with the arm.
Again, you will have to make something of a compromise, because you have two keyboards at different heights.

Step Six: Finally, make sure to notice whether or not any part of your arm has tensed up.  Check your wrist, shoulder, and forearm – if they feel tense, relax them while keeping your fingers on the keys.

Peter
In the interest of our members
AR-Group ADMIN

Peter Anderson

  • Administrator
  • Sr. Member
  • *****
  • Posts: 4344
  • Plays AR 80
Re: No__87____Regular Warm Up
« Reply #18 on: July 31, 2018, 06:02:03 PM »
Tips and Exercises for Proper Piano Hand Placement

As previously mentioned, proper ogan hand position takes consistent practice to develop.

Cortot, Leschetizky, and Dohnanyi all offer similar techniques when it comes to practicing good organ or piano hand positions.  (Examples of Dohnanyi exercises will be found in a Reply below.)   
In particular, playing variations of pentascales as chords, while lifting one finger at a time and holding the remaining notes down.

To make this applicable to those seeking to improve in this area, try the following exercise:

Play the notes C, D, E, F, G simultaneously as a chord with your right hand with one finger per key. Slowly let your thumb come up by letting the key lift it. When it reaches the top, don’t let your thumb lose contact with the key. Instead, simply press it down again by using the muscles in your hand.

Try not to let your arm and elbow do the work for you. If you have never done these piano or organ hand exercises before, you may feel as though you can’t push down on the keys very hard.    This is totally normal!   Don’t attempt to push down the keys too hard, just focus on making your fingers do the work.

Double check your keyboard hand position – Are the knuckles firm or floppy?   Are you tense in your arm or shoulder?

After completing this exercise with your thumb, work your way up your hand by having each finger separately push down its respective key while holding the others down.    In this manner, work your way up the hand and back down, eventually switching over to the left hand and doing the same process.

For those who are more adventurous or want some more keyboard hand exercises to do, you'll find many exercises in subsequent Replies, so you can see how well you do!

Make sure to pay careful attention to the positioning of the hands relative to the wrist, the knuckles, fingers, and so on. Go slow enough that you can do the exercise without tension.

Peter
In the interest of our members
AR-Group ADMIN

Peter Anderson

  • Administrator
  • Sr. Member
  • *****
  • Posts: 4344
  • Plays AR 80
Re: No__87____Regular Warm Up
« Reply #19 on: August 02, 2018, 07:52:32 PM »
Eight Piano Finger Exercise ideas for you to try

In no particular order, but here are some excellent keyboard finger exercises that are helpful for organists.

The following finger exercises should be done with a consistent tempo, even if it’s very slow, at first.

1.  5 note pentascales using one finger at a time. (C D E F G)–one finger per note.
In this keyboard finger exercise, the organist will hold down one note at a time and listen to the result.
It is important to only use your hand muscles rather than your whole arms or shoulders.
It’s such an easy exercise, but also surprisingly difficult for those who may not have strong hand muscles.

2.   Ascending and descending pentascales
After the first finger exercise is mastered, play an ascending and descending pentascale from the lowest to highest finger with both hands.
For instance, the left-hand pinky will play with the right hand thumb, and so on. Use the proper finger techniques.

3.   Play in thirds (skip notes) between each pair of notes that make up a third.
After the second exercise is mastered, using pentascales, play in thirds (skip notes) between each note.   Train your fingers to play every note legato – i.e. connected.

4.   Play with firm finger position
While having your hands at about playing level though not actually on the keys, prepare (bend) the knuckle closest to the finger-tip as though it were playing.
Lift your hand while keeping the finger position, then let it fall onto the key. If the knuckle collapses, try again from a lower height.
In essence, this finger exercise prepares you for the sensation of playing with a firm finger position without adding any arm weight or tension to the scenario.
By dropping your hands and arm on the keys, it allows you to focus fully on getting a solid finger position.

5.  Overlap- Legato
Play the notes in such a way that each note overlaps with the subsequent note.
For example, if you were playing a C major pentascales, you would hold down your thumb until you played your index finger, after which, you would lift your thumb and play your middle finger, etc.
This piano finger exercise is great for developing a great awareness of your fingers and learning to control each one individually.
It’s actually surprisingly difficult for beginners to do this exercise well!

6.   Hanon, Dohnányi & Czerny Technique Books   (Examples of these exercises and further information about them will be found in a Reply below.)
These books are fantastic for getting student’s fingers to cooperate!    Go through these with the techniques mentioned previously for maximum results.
Czerny is quite a bit harder than the early Hanon books, so keep that in mind when deciding on a finger technique book.

7.   Full (1 or 2 octave) scales
Practice full (1 or 2 octave) scales while preparing the thumb well before it’s actually played.
For instance, in a C major scale, after you have played the first D with your right hand index finger, immediately prepare the thumb so that it is ready on or near the note F. Practice all scales in this manner.
This exercise in particular is one that even well seasoned players benefit from.
If done properly, it will eliminate bumps and hesitancy in your scales and passagework, and allow you to play with greater speed and accuracy.

8.   Play two notes at a time on one hand at a time.
For instance, the right hand thumb and middle finger play simultaneously while the other fingers relax.
It’s important to verify that the other fingers are, in fact relaxing, as they will often try to interact when they don’t need to.
The pinky finger is especially notorious for wanting to be a part of everything the other fingers are doing, even when not necessary.

In conclusion, using these piano finger exercises on a consistent basis while using proper finger-technique will greatly enhance your ability to play the organ with greater accuracy and speed.
Remember that consistency is the key to changing older habits!

I hope you find these keyboard finger exercises helpful, but you will find some more examples of just what is available in the following Replies.

Peter
In the interest of our members
AR-Group ADMIN

Peter Anderson

  • Administrator
  • Sr. Member
  • *****
  • Posts: 4344
  • Plays AR 80
Re: No__87____Regular Warm Up
« Reply #20 on: August 04, 2018, 05:08:23 PM »
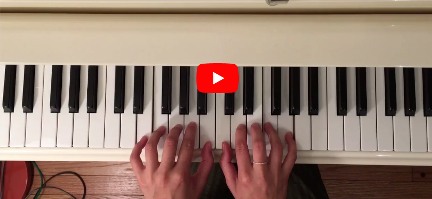
Ernő Dohnányi, published in Hungary a book of keyboard exercises in 1929, that was subsequently republished in 1950.   It had the catchy title,    “Essential Finger exercises for obtaining a sure piano technique.”    ISBN: 9790080026526     It contains 40 excellent piano exercises and is available in English
 
Here is a link to some 'essential Dohnányi exercises' being played for you on You tube:


Charles Louis Hanon
Hanon piano exercises have been meticulously constructed to provide the optimum level of practice for pianists of all levels and abilities. The full series of exercises have a proven track record in improving technical skill, speed and precision stretching back well over a century.
First published in 1873, The Virtuoso Pianist by Charles Louis Hanon has become a valuable source of inspiration for piano teachers, students and performers. The original 60 Hanon exercises have now been perfected and transposed to every major key, offering participants the maximum performance training and practice available.
To gain the utmost benefits from the logical progression of Hanon exercises, it is recommended to practise these piano exercises on a daily basis. In that way, pupils will rapidly notice the difference as their fingers become stronger and far more adept at challenging works and techniques.
A key element of the piano finger exercises is the focus on the daily repetitions of strengthening hands and fingers. The primary idea is to instil independence and flexibility in the performing digits, allowing every pianist's internal virtuoso out onto the musical stage.
Through the focused and concentrated practice of these exercises, all students can attain the fundamentals of superb performance and playing.
With the strength, endurance and general proficiency that piano finger exercises can encourage, it is no surprise that the wonderfully illuminating work of Charles Louis Hanon has remained a primary text for all pianists wishing to improve their entire range of piano playing capabilities.

This web-site:

https://www.hanon-online.com/

allows you to download 240 exercise scores free of charge.

You will find links to 5 Hanon sample exercises in the next Reply.


Carl Czerny (1791 - 1857) from Austria.
Carl Czerny (sometimes referred to as Karl; February 21, 1791 (?) to July 15, 1857) was an Austrian pianist, composer and teacher. He is best remembered today for his books of etudes for the piano.    Czerny was born in Vienna to a family of Bohemian origin.  He was taught piano by his father before taking lessons from Johann Nepomuk Hummel, Antonio Salieri and Ludwig van Beethoven.    He was a child prodigy, making his first appearance in public in 1800 playing a Mozart piano concerto.

You can view and acquire some of his scores at this web-site:

http://www.free-scores.com/Download-PDF-Sheet-Music-charles-czerny.htm


You will find links to 2 pdf scores of Czerny's scores, in the next Reply.

Peter
In the interest of our members
AR-Group ADMIN

Peter Anderson

  • Administrator
  • Sr. Member
  • *****
  • Posts: 4344
  • Plays AR 80
Re: No__87____Regular Warm Up
« Reply #21 on: August 06, 2018, 07:40:24 PM »
Here are the links to 5 Hanon exercises, which each open as a pdf, for to either view or print out:

Hanon Exercise No 1

Hanon Exercise No 2

Hanon Exercise No 3

Hanon Exercise No 4

Hanon Exercise No 5


and here are 2 from Carl Czerny:

Czerny Exercise No 1

Czerny Exercise No 2


This completes this section about Warm Up Exercises.

Peter

In the interest of our members
AR-Group ADMIN